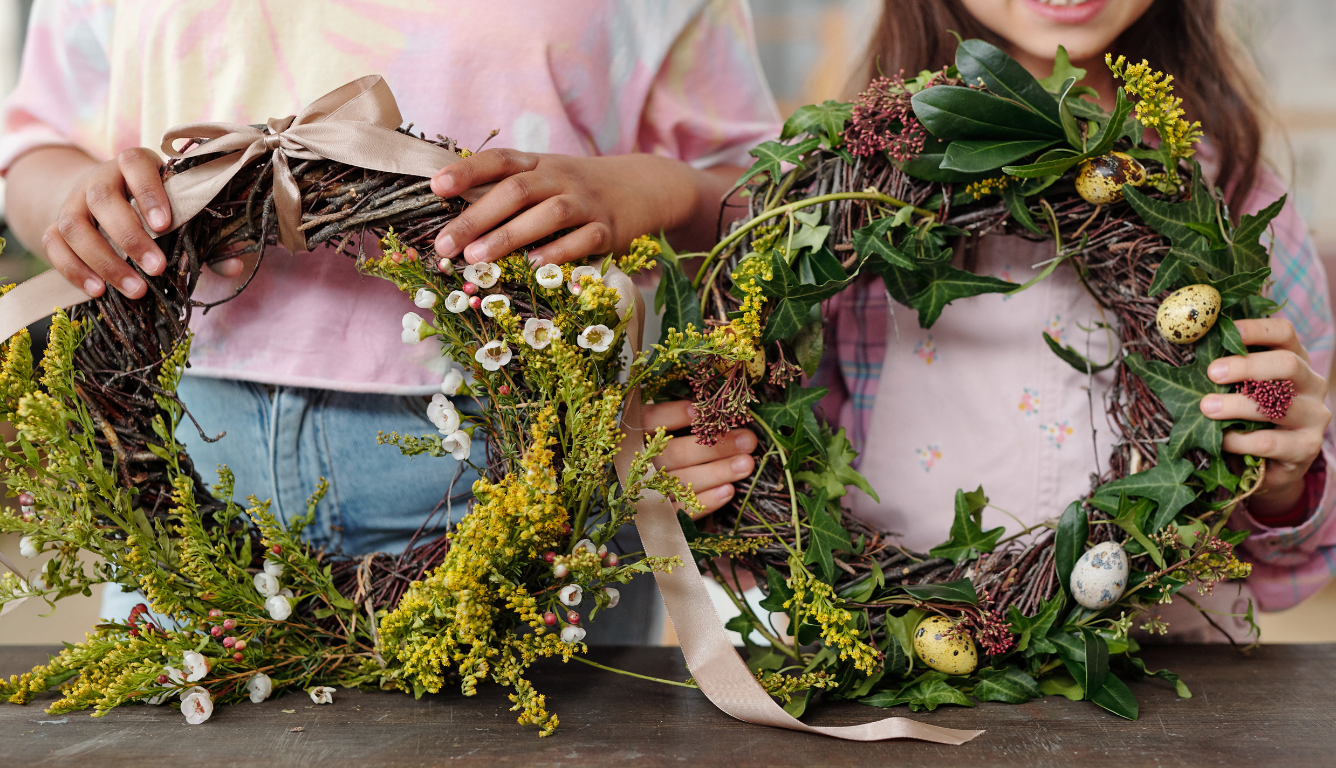
Make your own wreath

If you’d like to try your hand at one of these beautiful wreaths, we have created a style that could be started by simply going for a walk. With minimal tools required, your front door decoration could be closer than you think.
Therapeutic Benefits of Crafting:
Crafting is a great way to reduce stress and improve your mental wellbeing. Creative activities, like wreath-making, encourage mindfulness, as you’re fully immersed in the present moment. This can help to calm your mind, and offers a fantastic opportunity for your brain to reset and recharge. That means it can also help to reduce stress, as focusing on a creative task can distract you from life’s worries, and give you the opportunity to relax.
The process of crafting is therapeutic – but so, too, is the sense of accomplishment you get from completing a craft project. It feels great to create something from scratch, and it can help to boost your self-esteem and confidence. It’s an all-round boost for your mental wellbeing.
Choosing Your Wellness Materials:
There’s a huge choice of crafting materials out there – so how do you pick the right ones for your crafting project?
For these wreaths, you’ll need to select a range of flowers, feathers, twigs and foliage. Choosing these can be therapeutic in itself. Go for a walk and focus on the present moment. Listen to the sound of nature all around you as you select materials from the garden or hedgerow.
Remember, it’s important to only take what nature has already discarded. We recommend not cutting leaves or twigs off trees where possible, so try to select materials that you’ve found on the ground. It’s the perfect way to create an eco-friendly wreath.
You’ll need
- Copper wreath ring (from a florist or garden centre) or pliable twigs twisted into a circle (such as elder or willow)
- Garden wire
- Secateurs or strong scissors
- Glue gun or very strong craft glue
- A strip of pretty fabric or ribbon
Decorations
Anything you can find in the hedgerow or garden like:
- Plants going to seed
- Ivy
- Twigs covered in lichen
- Berries
- Feathers
- Flowers
Creating
Step 1: Loop your flexy ivy around your ring or ringed twigs, keep going until you’ve covered the base. Pull it through so that it looks natural, but forms a stable base. Keep adding more of your foliage (ivy, lichen and honesty) to the frame, layering and overlapping it until you reach your desired aesthetic.
Step 2: Prepare your pine cones and seed pods by wrapping or piercing the base with wire, leaving enough wire at the end to attach to your wreath – better too much than not enough, you can always cut any loose ends afterwards.
Step 3: Start adding your other decorations. Loop the wire trail on your pine cones and seed pods under the foliage so that you can’t see the wire. Use the glue gun or strong craft glue to attach the berries and feathers. You could try laying it out first to see where you like it before attaching it permanently. But don’t worry, nature isn’t perfectly symmetrical, so a bit of mismatch is always lovely.
Step 4: Leave the wreath to settle and the glue to dry. Once it feels secure, wrap the strip of fabric or ribbon around the top, tie and then hang in your chosen location.
Most of the decorations used should last a few weeks at least. If the berries dry up, they may fall off, and this gives you the chance to revamp it a little and glue on some new berries or plants you find in an afternoon walk.
Ergonomics and Comfortable Crafting Spaces
Crafting involves a lot of fine motor skills, and you may find yourself hunched over a crafting table – which could lead to back ache. That’s why it’s important to create a comfortable and ergonomic space where you can relax.
You should prioritise proper seating with good back support and adjustable height, so you can get your chair in just the right position for crafting. Use our Chair Finder to find the perfect chair for your crafty pursuits.
You should also consider what lighting you have. Natural lighting is best, but you may also want to position a lamp in your crafting space, to ensure you have plenty of light to see what you’re doing. Think about how your crafting space is set up, too. Organise all the materials you need within easy reach, and use shelves, drawers and boxes to minimise clutter and create a clean, tidy space.
All of these elements will help to create an ergonomic space that’s pleasant to spend time in – so once you’ve completed your wreath, you’ll want to start on your next craft project straight away. The only decision is: what will it be?
Looking for more inspiration for craft ideas in the summer time? Read our blog post for more information.
Sign up for our newsletter
Sign up for our newsletter to hear about our exciting new collections, interior trends, wellbeing advice as well as exclusive offers.


